Weekly Dinner for Two
What is Eggwich🔗
It is an egg patty layered with add-ins sandwiched between bread. The novelty lies in the design of egg patty. It's an extremely elegant template to add to your arsenal. For bread part, you can use any of your favorite sandwich loaf or make yourself if feeling ambitious. This post is an in-depth tutorial on the egg part that gets your started on the first sample eggwich.

Why it's Awesome🔗
I've always been making delicious dishes. I've constantly been developing useful techniques. But there is no other recipe that I feel more compelled to share than this one. It's almost too awesome to be true. Let me try to make an equally awesome pitch.
To be a good recipe, we usually look for the following properties:
- delicious
- nutritious
- customizable
- scalable
- no special equipment
- fail-proof
- hands-off
- make-ahead friendly
- leftover friendly
What if I tell you eggwich checks all the boxes and possibly more. Speaking as an experienced home chef, it's a gem to possess all the nice ups and no single down that I can even nitpick. This conclusion is given after stress testing for more than 5 times. Let me elaborate on the nice properties.
Without saying everything I make is by default [delicious] and [nutritious] (not the most humble way of speech but it is the way of cooking). On taste, who doesn't love eggs? On nutrition, what beats eggs? Egg has some many friends in meat and veggie that it's very [customizable] for both taste and nutrition profile. It offers a template rather than a particular realization.
It's very [scalable]. It takes basically the same time and effort as you scale up portions. It's only limited by how big the baking vessel is. This leads to [no special equipment] needed. It works on baking vessels of any material (metal, ceramic, glass) and size. Your only choosing criteria is surface area. As surface area determines how many portions it yields. I’ve tested on all the baking vessels (loaf pan, aluminum sheet tray, ceramic tray, metal roast tray) at home. No exceptions, all have perfectly tender succulent results. It's a beauty in design that scalability comes at no cost and success is agnostic of hardware.
The beauty further extends to implementation. It's [fail-proof] on both measurement and operation. Lots of wiggle room. No tricky maneuver or timing. Almost guaranteed first time success. Just a couple of guidelines to follow (details in the next chapter). After prepping, main cooking time is done in the oven and therefore [hands-off]. No need to watch over anything other than setting a timer.
Just like any casserole type bake recipe, it's [make-ahead friendly] and [leftover friendly]. It's a brilliant solution particularly for these two scenarios:
- To serve many portions hot all at once (for a crowd at party)
- To divide portions into multiple days (for a family weekday dinner)
I've made many promises so far to pitch you this brilliant idea. Now let's get down to the only few guidelines that will guarantee success on your first go.
How to DIY🔗
This recipe is very forgiving and flexible. You can make all kinds of variations once understand the following three rule-of-thumbs.
- Measurement
Everything starts with answering the question of how many portions. One portion is approximately the cross area of a sandwich loaf. Depending on the bottom area of the baking vessel, estimate how many portions it has. For each portion, use 1.5-2 eggs. Do the math and you'd get a range for the number of eggs. Use the lower bound if you plan to have more add-ins and upper bound vice versa. For reference, here is a lookup table for some common bakewares, their suggested portions and eggs needed1.
| Bakeware | # portions | # eggs |
|---|---|---|
| loaf pan | 2-3 | 4 |
| quarter sheet tray | 4 | 6 |
| 9 x 13-in tray2 | 6 | 9 |
| half sheet tray | 8 | 12 |
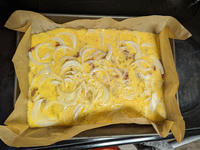
Next, counterintuitive yet very important, add in liquid (water, milk, stock, etc) of volume at least 1/2 up to 3/4 of egg volume. The reason behind this is to compensate for the loss of moisture due to evaporation during baking. The amount of additional liquid keeps custard tender and moist. You should see a significant paler yellow color after adding in the right amount of liquid.
After eggs are fully beaten and watered down, now it's the seasoning time! It's the fun part that you get to customize to your own likings.
Tips on seasoning:
- Be generous. Definitely need to salt enough. But take into account salt level of add-ins (e.g. bacon, cheese etc).
- Be adventurous. Got any spice that you are curious about but have never tried in the back of pantry? Perfect time to experiment.
- Be spontaneous. Use what's handy or available. E.g. garlic powder as alternative, leftover stock or pickle brine for additional flavor, etc.
- Add-in
There are so many good egg combos. Just to share some of my favorites.
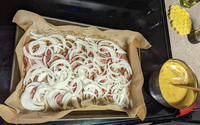
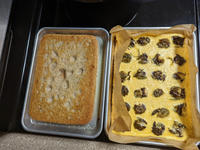
- Bacon Classic for a reason. No need to elaborate on flavor. On the practical side, workflow is seamless. Lay bacon on the same baking vessel to fully cover surface area. Bake until fat is rendered out. Pour in egg mixture. Hands-off grease-free way to have bacon done and bond to egg. Bacon fat is the best flavor for eggs too.
- Roasting veggie Any veggie that's suitable for roasting will make a good filling. For the same reason as bacon, one tray method captures all the flavor and oil in egg mixture. Seamless workflow.
- Cheese Mozzarella for better structural integrity, sharp funky cheese for more flavor, soft cheese for creamy texture
- Any leftover To bulk up volume or use as kitchen sink
Whether or not you decide to combo bacon or roasted veggie with egg bake, line your bakeware with parchment paper for i) nonstick and ii) easy to lift and divide.
- Temperature and Time
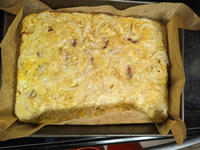
350F for 30-40min. The exact time will differ on how much water is in the mixture. It's done when there is no visible excess water on the surface.
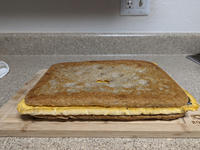
Let egg bake cool down before cutting into individual portions. You can get very satisfying clean rectangle cuts that fit perfectly in between your bread of choice to make it into eggwich.
Demo🔗
9x13 pan🔗
- 6 servings
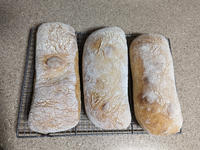
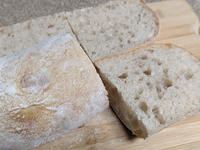
- 3 Ciabatta (hashtag matching size)
|
|
|
|---|---|---|
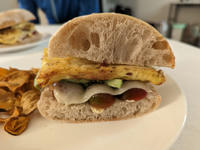
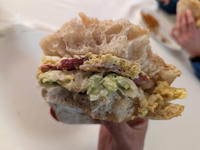
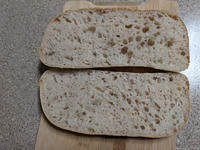
| my proudest bread so far | 1 Ciabatta for 2 eggwich servings | super open crumb, crisp not hard crust, made for thiccck eggwich |
- Assembly
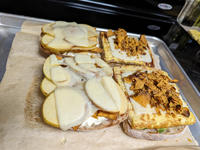
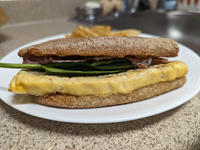
It's always the most fun part. Once there is a solid (both in flavor and structure) center-piece, we can get creative about spreads for the bread and add-ons for additional layers. Just try to keep add-ons in sliced form and not stack too high for ease of consuming. Any violation would just end up a delicious mess. No complaints at all.
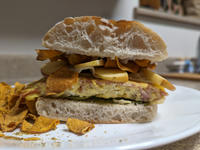
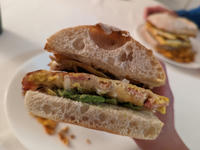
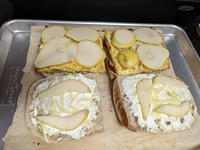
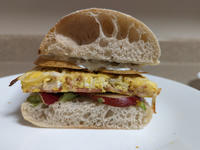
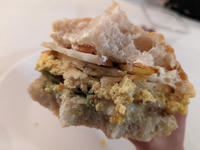
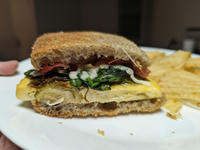
Here are the three versions we've made. As always our rating is in ascending order simply due to perfection after repetition. IMO, all three versions make a killer sandwich that you'd exclaim three times "this is the best". But bacon flavored pear juice is just a speechless showstopper. Now go ahead and make an eggwich yourself.
- Avo tomato
- Avo apple potato chip
- Avo pear
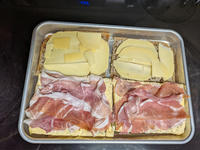
quarter sheet tray🔗
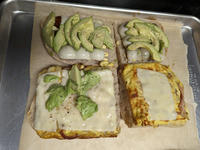
- 4 servings
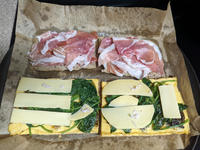
- Prosciutto spinach Gruyere
1 The portions largely depend on what size bread you have and how filled the egg patty and/or sandwich is. Rule-of-thumb, the thicker, the smaller surface size.
2 Upon time of writing, I just found out 9 x 13-in means tray of bottom dimension 9 x 13-in, which is the smallest projection area. Note that specs for quarter sheet tray also say 9 x 13-in. But that refers to rim dimension, which is the largest projection area. For a minute I was doubting how come I've made 4 portions out of quarter sheet tray and 6 out of 9 x 13-in tray if they are the same dimension. After double measuring the two trays, mystery solved. Nonstandard convention. Sigh.
